Because of all the pictures I use to illustrate this page it will take a long time
to load if you don,t have high speed internet.
IMPORTANT THE CONSTRUCTION OF THIS IS DANGEROUS IF YOU CAN NOT WORK
SAFELY WITH HAND TOOLS AND POWERTOOLS DO NOT ATTEMPT.I MAKE NO
CLAIM TO THE CORRECTNESS OR
SAFETY OF ANY CONSTRUCTION TECHNIQUE.
KIDS TALK TO YOUR PARENTS BEFORE TRYING THIS.
ALWAYS WEAR EYE PROTECTION AND FOLLOW TOOL SAFETY TIPS
This is a simple beehive which will give many years of service as a hive body
for a non commercial beekeeper (someone who does not move on a regular basis)
the box section will work for a honey super but does not have the strength to
stand many years of service as one.Everything must be painted well.Any change from
the plan could render hivebody very weak ie nail the bottom board on and don,t forget the cleat.
Firstly you will need some tools and 1x12 or 1x10 timber I have seen plywood
used as well for the sides but Im not sure how it lasts.you will also need
plywood for the top and bottom here I used 1/2 inch.In Australia many beekeepers
used light galvanised metal sheeting or aluminium for the bottom and I have found both to
be very good
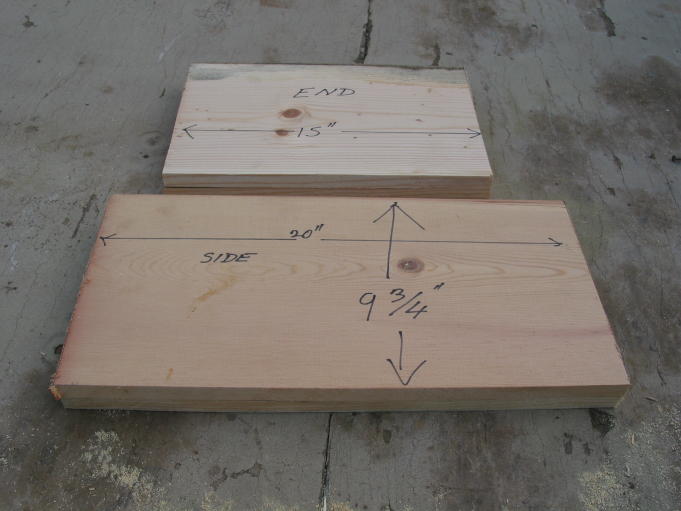
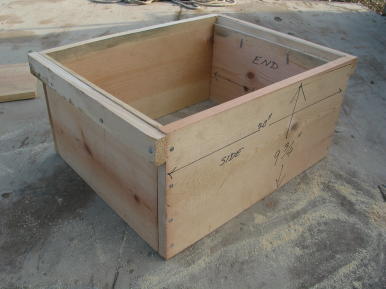
For the hive body you will need 2 sides and 2 ends
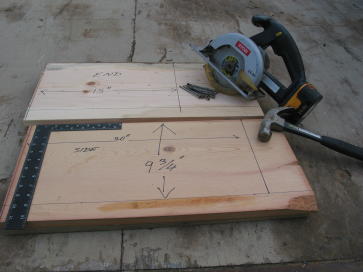
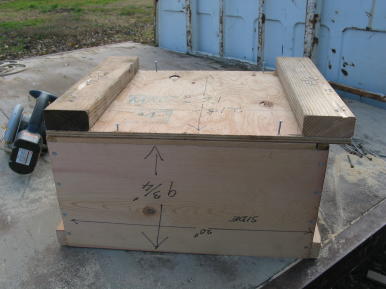
Side dimensions are 9 3/4 inches high 20 inches long
end dimensions are 9 3/4 inches high 15 1nches long
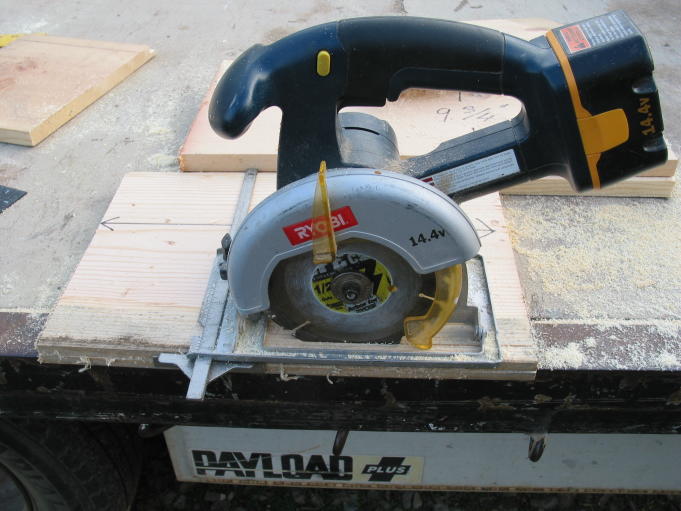
you will need to cut out the frame rests using the circular saw THIS IS VERY DANGEROUS
make the cut 3/8 inch wide and 3/4 inch deep
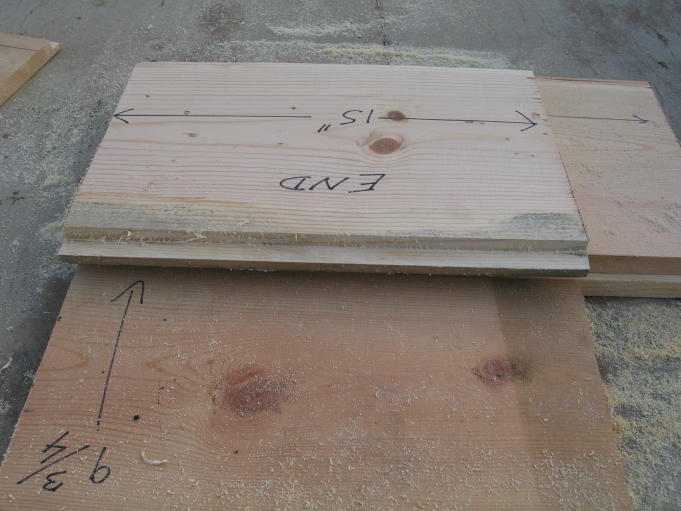
Your bee hive end should then look like this.
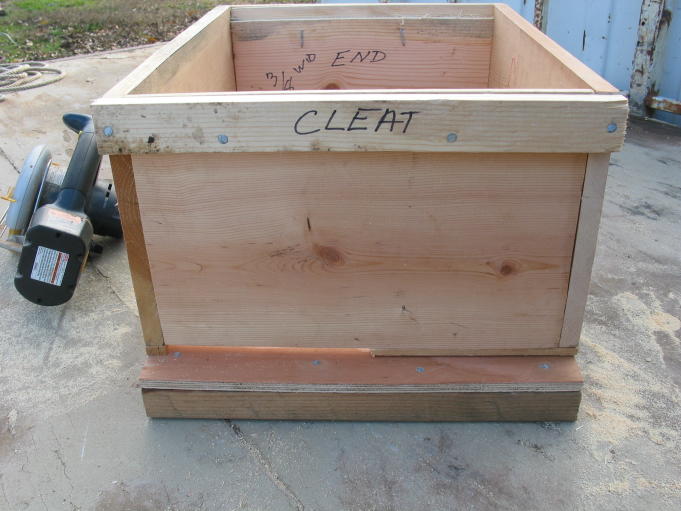
Next you are going to need to nail 2 sides and 2 ends together
I start by half driving a nail in each corner of the side this makes it easier
to put together
I am using 8 penny nails that have been galvanised

4 Nails into each box then add your cleat which is a piece of
2x1 the length of the box the piece i used was lef over from trimming
the sides and ends

Now you have your finished box this can be used as a second or a honey super
but eventually those nails are going to give out, better to use it as a hive body
the added strength of the bottom nailed to it will keep it together for many years
I had some of these in Australia that were still going strong after 10 years
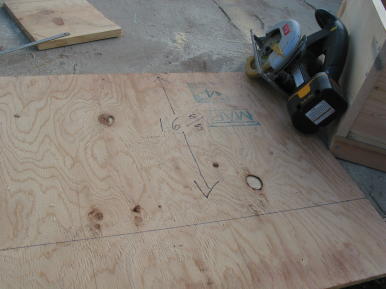
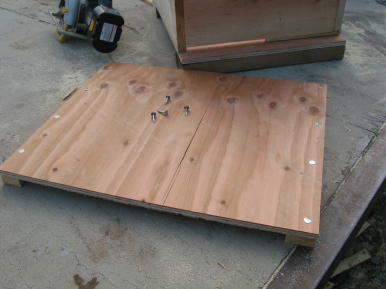
Now you need to cut your plywood for top and bottom 16 1/2 wide and 21 1/2 long for both top and bottom
Nail "legs" to bottom board I use roofing nails for this

Riser boards for the bottom can be cut using the circular saw 3/8 inch thick
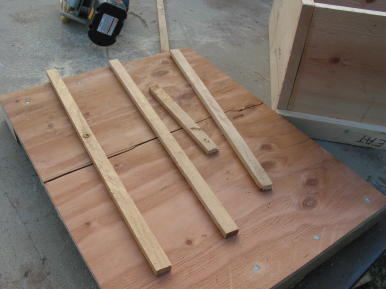
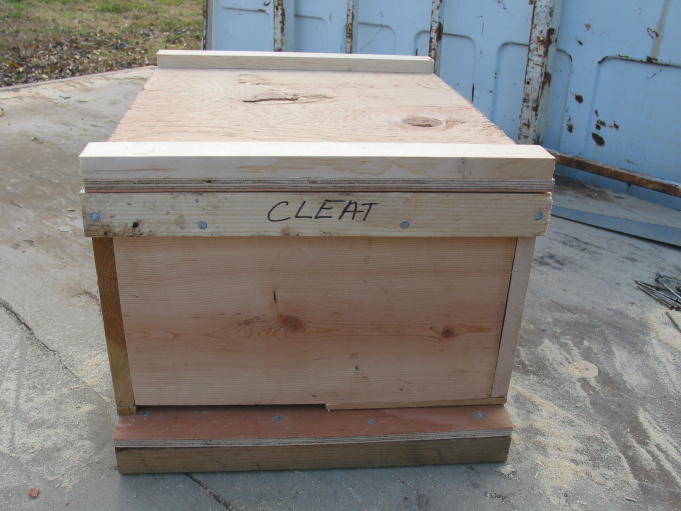
First nail riser boards to the bottom of the bee box notice the half entrance at the front
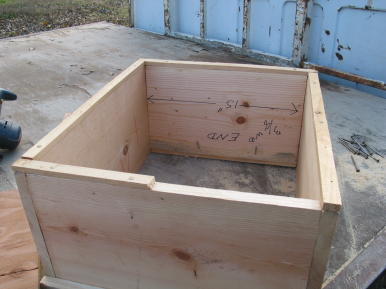
Now nail bottom to bee box use 6 8 penny nails.
Here is your completed hive body all you need is a lid
Nail 16 5/8 lengths of 1x2 to the top of the ply you have already cut out
paint well and you have a lid use roofing nails for this as well
The completed bee hive,hive body ready for frames and bees
For equipment check out the suppliers below
dadant
mannlake